This article is Part IV of a series called Track Your Adventures for Free where I outline how to use Ham Radio and your Smartphone as an affordable APRS tracking system. For reference, here are links to the first 3 parts:
- Track Your Adventures for Free
- Track Your Adventures for Free – Part II – The Hardware
- Track Your Adventures for Free – Part III – Making the Connection
In part III we modified a smartphone headset and our Baofeng UV-5R headset to create an interface between the speaker and microphone of the two devices. As a refresher, in part I we discussed how APRS works using digital packets that are encoded in analog signals. The ham radio will receive these analog signals, which are audible to the human ear, and we must get these analog signals to our smartphone so it can decode the digital packets of information that are encoded in the signal. These packets will contain the APRS position and identification data from transmitting stations. On the other side of things, our smartphone will also use its internal GPS to determine your current position, and then use this data to create an AX.25 encoded analog signal that it will send to the ham radio to broadcast your position. Great, but how do we accomplish this?
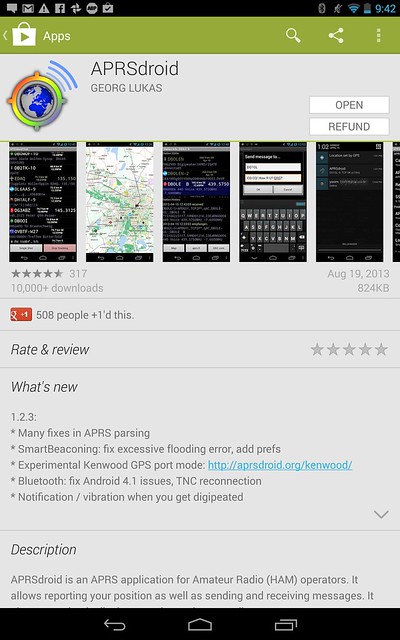
The answer, for Android based smartphones, is to use a piece of software called APRSDroid. It is available on the Google Play store for $4.99, lifetime updates included via the play store. However, the developer also provides the software for free on the APRSDroid Website. You can download the APK to your Android phone and install it outside of the market at no cost to evaluate it. Just keep in mind that because it was installed manually, updates will not come via the Google Play store like other apps. You will have to keep track of new releases as they come out and manually install them. I recommend purchasing the app once you have evaluated it and made sure it works out for you simply to support the developer in his great work and also to ensure you always have the latest version.
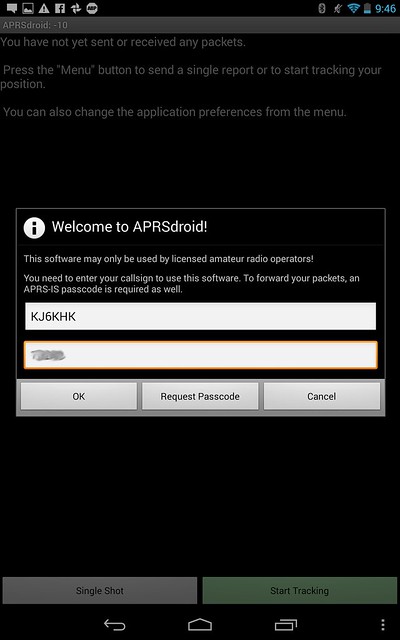
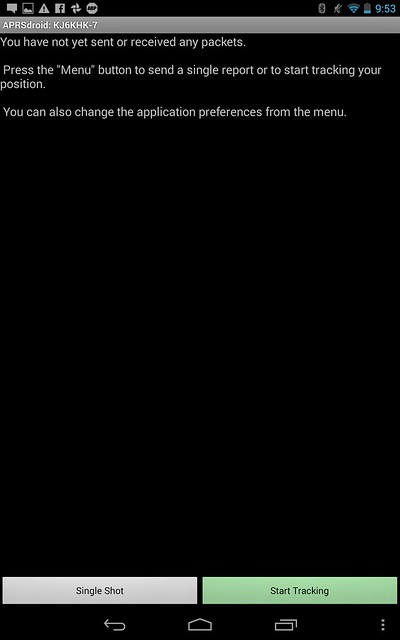
After you install the application either manually or purchasing it on the Play Store, open the application and you will be greeted with the following:

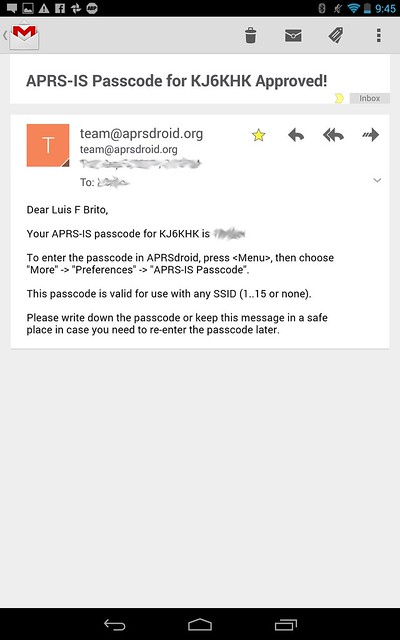
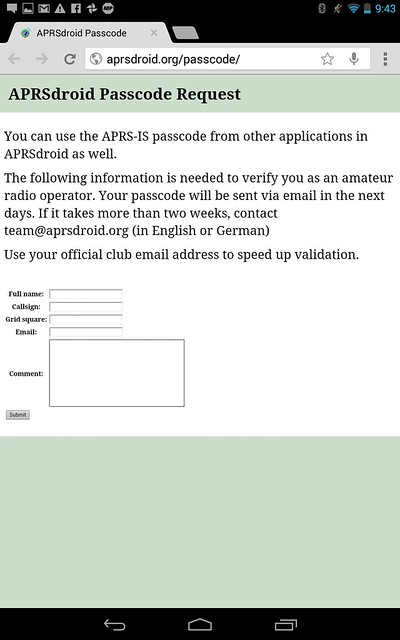
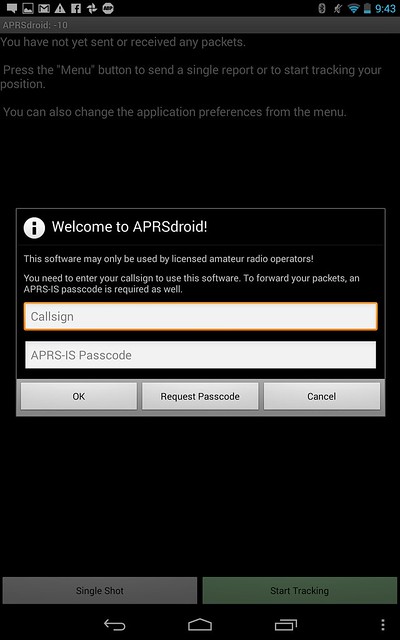
For many of you, this will probably be the first time you hear about APRS-IS. APRS-IS (Automatic Packet Reporting System-Internet Service) is the common name given to the Internet-based network which inter-connects various APRS radio networks throughout the world (and space). APRS-IS is maintained and operated by volunteer Amateur Radio operators to provide world-wide capabilities to the Amateur Radio APRS RF networks and to promote the Amateur Radio service as a whole. Because you will be injecting information into the APRS-IS system, which is designed for licensed amateur radio operators (Hams), you must be properly identified to obtain the privilege. Assuming you do not already have an APRS-IS passcode, you should click on the “Request Passcode” link to continue.
Clicking the link launches a web browser window that takes you to aprsdroid.org/passcode to fill out a form to obtain your passcode. This is not an instantaneous process, as the authors will verify your license information and then manually issue you a passcode. Expect the process to take a few days depending on how busy the queue is. In a few days, you should receive your APRS-IS passcode that you can use to log-in to the application at the welcome screen.
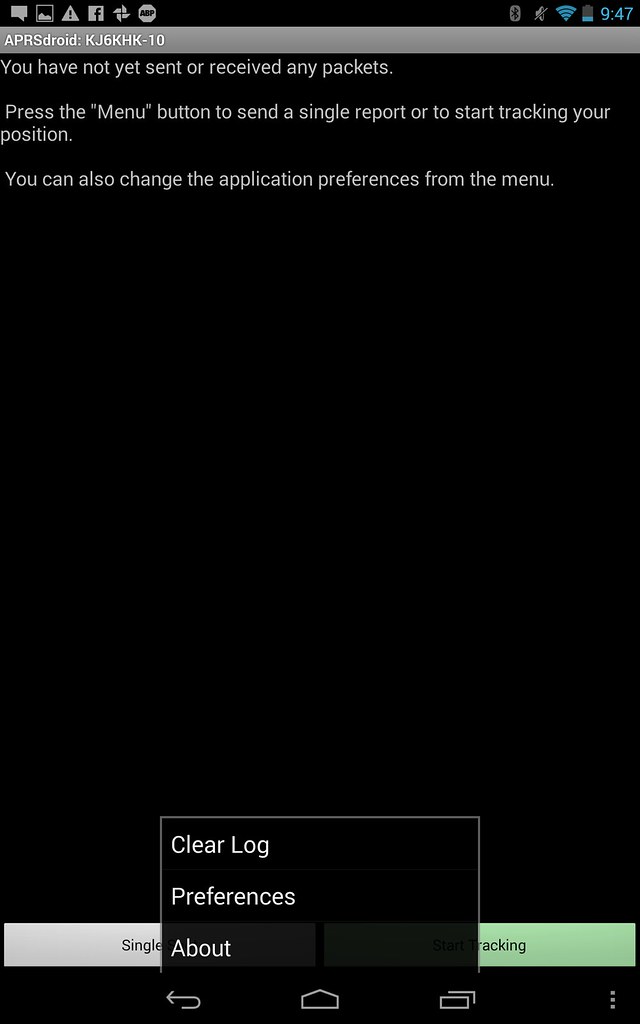
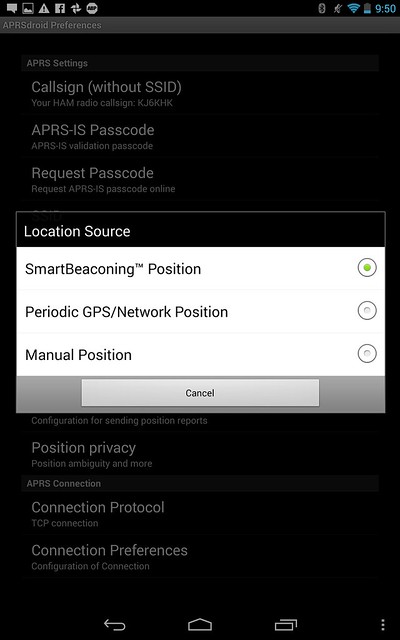
Once you log in to the the app, you will see the main screen and notice your call sign at the top left. From here, you should start by touching the menu button at the bottom right hand of the screen, and then selecting “Preferences” at the pop-up menu as shown here:
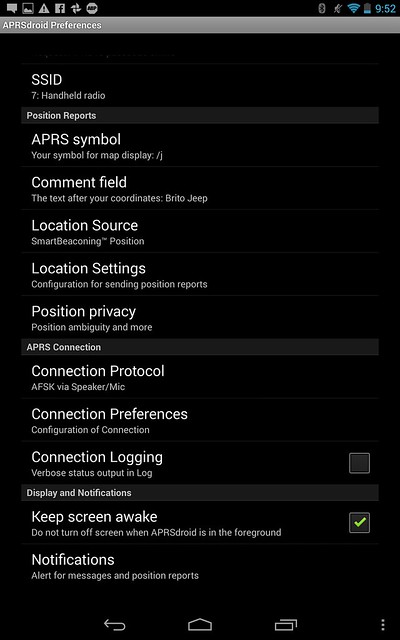
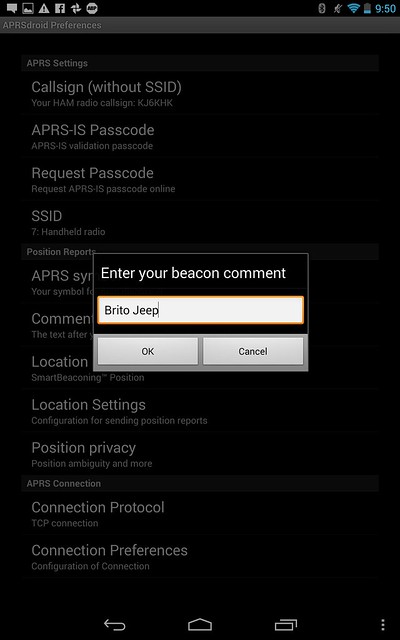
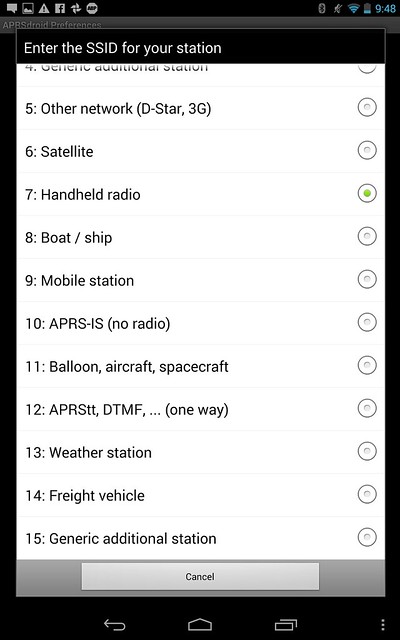
This will take you to a preferences screen where you want to change several preferences. After you complete setting up your preferences, you can start experimenting with tracking by connecting your radio and the cable we made, or by starting off with using a TCP connection and APRS-IS alone for testing. In any case, pictures are worth a thousand words, so here is a gallery with pictures and some of the next steps you need to perform, check out the screenshots and read the captions and let it guide you through some of the rest of the process. You can make the gallery full screen if needed to get a clear picture of what is on the screen:
No photos available right now.
Please verify your settings, clear your RSS cache on the Slickr Flickr Admin page and check your Flickr feed
new
No photos available right now.
Please verify your settings, clear your RSS cache on the Slickr Flickr Admin page and check your Flickr feed
Start new Photonic


End Photonic
embed test

end embed
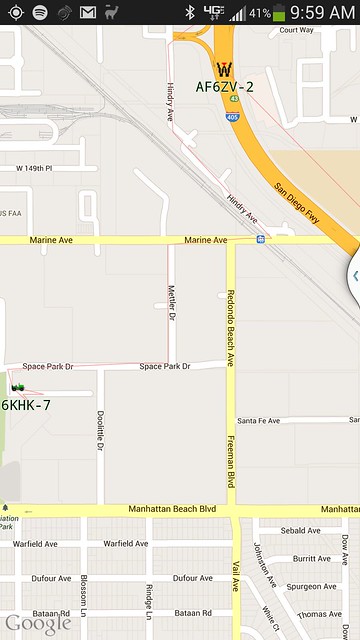
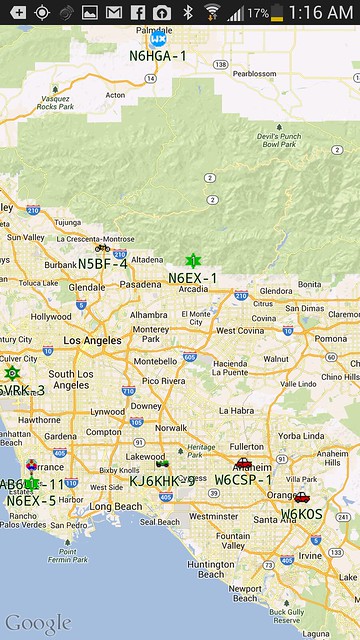
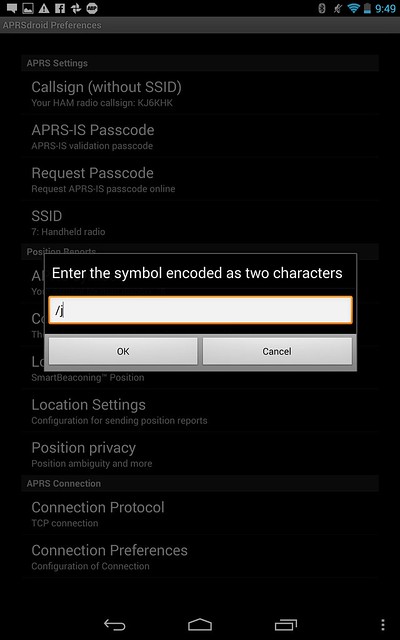
For reference, you can find APRS Symbols on http://www.aprs.org/symbols.html and reference the letter chart with the symbol chart. If you notice that where the letter “j” is, there is a corresponding Jeep symbol in that spot, which is why my symbol shows up as a Jeep since I entered “/j” for my symbol code.
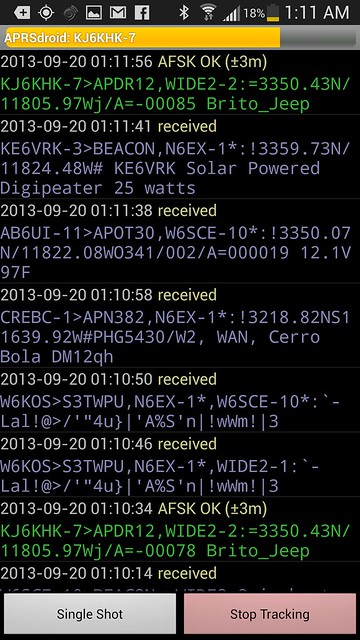
Of course, we haven’t yet discussed how to setup your radio, which is a very important part. Start by making sure your radio is tuned into the APRS frequency, in the US, this will be in the 2-meter band at 144.390MHz. If you tune to this frequency you may start hearing those strange sounding transmissions of packet data coming in. This is a good sign, as you will soon be decoding these packages. However, if you aren’t receiving any, you may want to get closer to a large window or in an open area with better reception. It also may just be possible that there is limited activity in your area at the particular time. In any case, there are several other steps we need to take before we start decoding signals and sending out our own. At this point, you have hopefully heard some activity on the 144.390MHz band, and you can proceed to connect your Smartphone to radio cable. Be sure to turn down the volume on your radio to a very low level, just 1/8 of a turn away from the off position should be fine. This will lower the power level being delivered to the microphone. The same applies to the phone, you should lower your “Media” volume to the lowest or second to lowest sound level setting. At this point, if you are already in Track mode, you may start to see some decoded packet data in your log as the radio sends them to the phone via the custom cable. If not, you can go ahead and start tracking to see what you get. When activity occurs, you can see a bar (orange), go up and down in level at the top where your call sign is. If this bar is not reaching at least the halfway point when a signal is received, this is a sign that you should raise the volume on your radio a bit to get it close to the middle but try not to exceed 80%. Again, you will have better luck outside or near an area with good signal, and you will definitely get better results if you are connected to an external antenna.
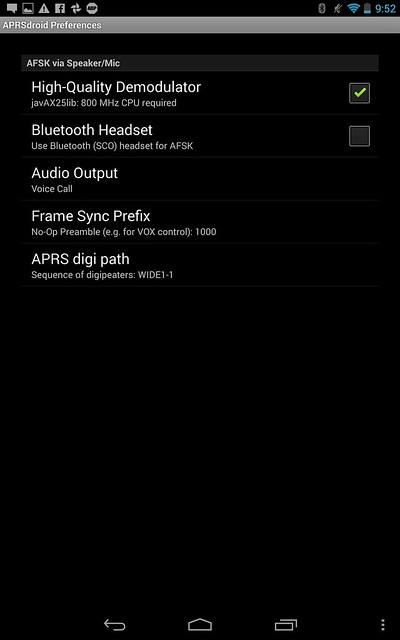
Transmitting your own position data is a little more involved because we have to enable the radio’s VOX (Voice Activated Transmit) mode. By turning on VOX, you make it so that anytime the smartphone sends a packet, you don’t have to press the Push-to-Talk button for it to transmit. Since the radio is dedicated to APRS, and the microphone input is directly tied to the smartphone, the radio should will only transmit when the phone sends a sound in VOX mode. In the Baofeng UV-5R series of radios, you go into the radio’s menu system and scroll through until you find the VOX option. Select it, and then set the level to “5” to begin, then save the setting. At this point, there is some trial and error required to get the best results. For me, level 6 worked well with my volumes low, but this can vary based on your smartphone’s headphone speaker output levels. You can test to make sure that the radio activates and transmits by sending “Single Shot” data manually, which tells the smartphone to manually broadcast your position when the button is pressed. You should see the radio light up and indicate it is transmitting when you press this button. You should also see green text in your log that says you transmitted your position, as well as activity in the orange bar. It is very helpful at this point to have a second radio to make sure that you actually transmit a signal and that it sounds like an AX.25 encoded transmission. If you find that your radio is not activating fast enough and some transmission signal is lost, you may have to increase the VOX sensitvity to 6 or 7, or maybe increase your phone’s Media Volume. The problem with increasing the VOX level is that sometimes if it is set too high, it can be triggered by line noise, and your radio will transmit even when the phone is not sending a message due to picked up noise along the cable we made. Here again, a second radio helps to determine if your radio is only transmitting when it is supposed to and not randomly keying off due to noise at times.
Despite the trail and error to get the volume levels correct and the VOX sensitivity correct, once you find the best balance, you can simply make a note of the settings and they should work fine from here on. With my rubber duck antenna on the Baofeng radio, I didn’t have too much luck getting a lot of traffic at home. There was a lot of activity once I hit the road, though. However, my transmissions from home only registered when I stood up high on some planters in the backyard where it was nice and open. This changed dramatically when I connected my radio to an external magnetic mount antenna in the Jeep. I used THIS ANTENNA that I bought for around $20 on Amazon. It is a Tram 1185 magnetic mount dual band antenna, and it has a very strong magnet that is able to hold the antenna on my Gobi rack’s thing expanded metal grate and it holds up to washboard roads at high speed. It’s a very solid hold, I was surprised. I was also very much surprised at how much extra range I obtained with an external antenna. I was able to hit the repeaters 26 miles away. If you decide to get that antenna or any other antenna, make sure to check the connectors it comes with. The Tram 1185 like most antennas comes with a PL-259 connector, so you need a PL-259 to SMA female adapter in order to get it to interface with the Baofeng radio.
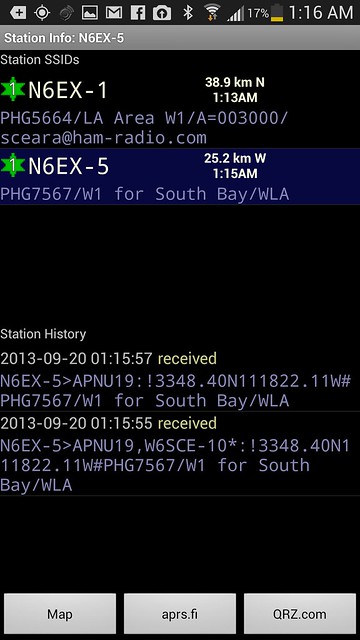
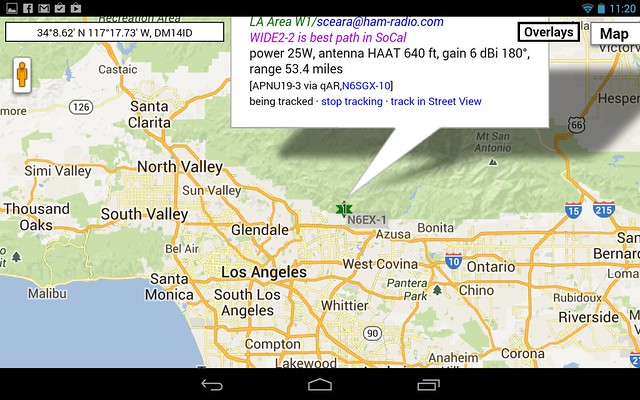
So how do we know that we have things working optimally? Well, when it comes to receiving data, you should know because you will start to get packet data with the position of APRS users or objects nearby. If you are seeing some data come in, then your receive function is doing well. But, what about your transmissions? This is when you must go online and go to http://aprs.fi and check on the web if you are registering in the system. At the aprs.fi website, you can enter your call sign and run a search. If you show up in the system, then at least one of your transmissions managed to make its way to a local digipeater who uploaded your data to the APRS-IS database. This is a good sign, but you must also check to see if the data is current. If you go for a drive and you see that most of your track shows up correctly, then you are fine tuned. However, if your track is showing up spotty and random, and you have Smart Beaconing on, you may have to fine tune things a little if the areas you were travelling should have had a decently good open area for your signals to get out. Keep in mind that if there were a lot of tall buildings or overpasses, then this could be the cause of the problem and not your settings.
With that note, you will also notice that this is the website that tracks you. This is the site that you can share with friends and family who can use APRS to keep track of your position. Once properly setup, you should be able to set and forget the system on your next trip and get a good track in areas where there are APRS digipeaters or there is data available. As you explore APRS, you will also find that there are provisions for messaging other APRS users and receiving messages. There are some advanced ways that you can make use of this messaging feature to send out SMS or e-Mail messages, but we will leave that for another article! For now, enjoy APRS, and enjoy fine tuning your system! Take some time to explore the options available and tinker away!