Track Your Adventures for Free – Part IV – The Software

This article is Part IV of a series called Track Your Adventures for Free where I outline how to use Ham Radio and your Smartphone as an affordable APRS tracking system.  For reference, here are links to the first 3 parts:

In part III we modified a smartphone headset and our Baofeng UV-5R headset to create an interface between the speaker and microphone of the two devices.  As a refresher, in part I we discussed how APRS works using digital packets that are encoded in analog signals.  The ham radio will receive these analog signals, which are audible to the human ear, and we must get these analog signals to our smartphone so it can decode the digital packets of information that are encoded in the signal.  These packets will contain the APRS position and identification data from transmitting stations.  On the other side of things, our smartphone will also use its internal GPS to determine your current position, and then use this data to create an AX.25 encoded analog signal that it will send to the ham radio to broadcast your position. Great, but how do we accomplish this?

The answer, for Android based smartphones, is to use a piece of software called APRSDroid.  It is available on the Google Play store for $4.99, lifetime updates included via the play store.  However, the developer also provides the software for free on the APRSDroid Website.  You can download the APK to your Android phone and install it outside of the market at no cost to evaluate it.  Just keep in mind that because it was installed manually, updates will not come via the Google Play store like other apps.  You will have to keep track of new releases as they come out and manually install them.  I recommend purchasing the app once you have evaluated it and made sure it works out for you simply to support the developer in his great work and also to ensure you always have the latest version.

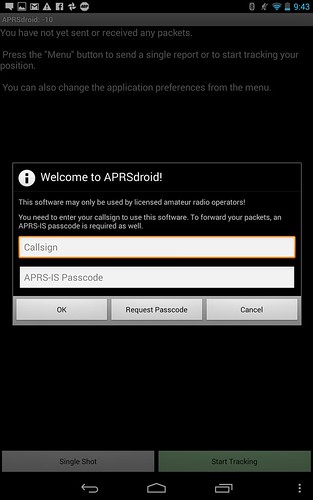
After you install the application either manually or purchasing it on the Play Store, open the application and you will be greeted with the following:

APRSdroid Start

For many of you, this will probably be the first time you hear about APRS-IS.  APRS-IS (Automatic Packet Reporting System-Internet Service) is the common name given to the Internet-based network which inter-connects various APRS radio networks throughout the world (and space). APRS-IS is maintained and operated by volunteer Amateur Radio operators to provide world-wide capabilities to the Amateur Radio APRS RF networks and to promote the Amateur Radio service as a whole.  Because you will be injecting information into the APRS-IS system, which is designed for licensed amateur radio operators (Hams), you must be properly identified to obtain the privilege.  Assuming you do not already have an APRS-IS passcode, you should click on the “Request Passcode” link to continue.

Continue reading Track Your Adventures for Free – Part IV – The Software

Death Valley National Park

Death Valley National Park has been a destination that always came up on our list of places to go but never quite materialized.  It just so happened that a friend of ours and a small group planned a trip to Death Valley and the dates landed perfectly between all of our other commitments.  Before we knew it, we were all packed up and ready to go for 3 days of excellent exploration.

Day 1 & 2:

We headed out after a busy day of work to camp for the night at our meeting point for the next day, the Wildrose Campground.  Wildrose is a great place to stay if you are looking for a developed area.  It has 23 sites available, with running water, tables, fire pits, and pit toilets; there is no fee to stay.  It is open all year, and accessible by any type of vehicle.   We rolled in pretty late that night, greeted our friends Tim and Molly, popped open our tent and went to bed.

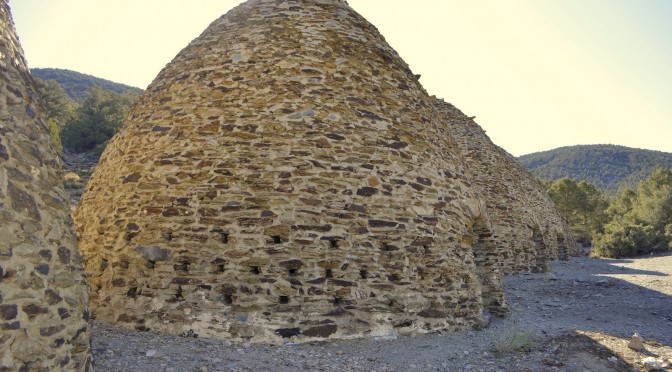
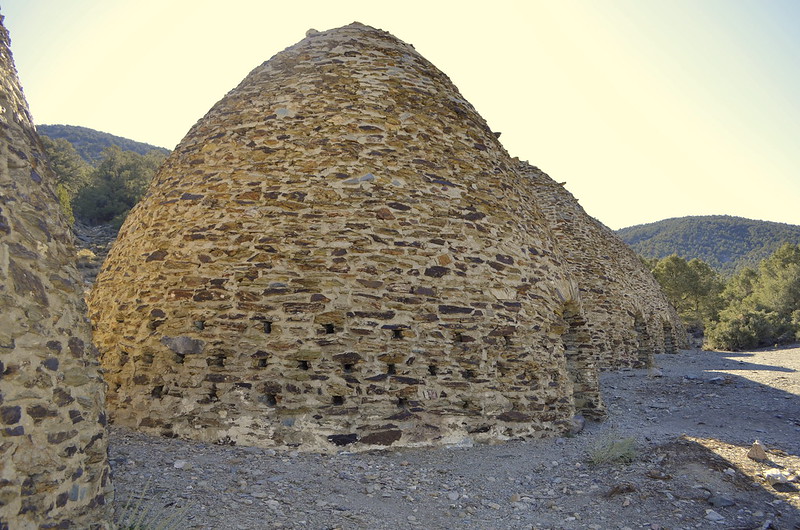
The next morning, the rest of the group arrived and after a quick drivers meeting and route discussion, some of us headed over to see the Charcoal Kilns at the nearby Wildrose Canyon.  The Charcoal Kilns were said to be built in 1877 by the Modock Consolidated Mining Company to produce charcoal to fuel a nearby lead-silver mine’s smelters.  Charcoal burns slower and hotter than wood, and is made from wood in kilns such as these to convert it to a roughly 96% carbon content.  The particular kilns are about 25 feet high, and are very well preserved.

Death Valley Charcoal Kilns

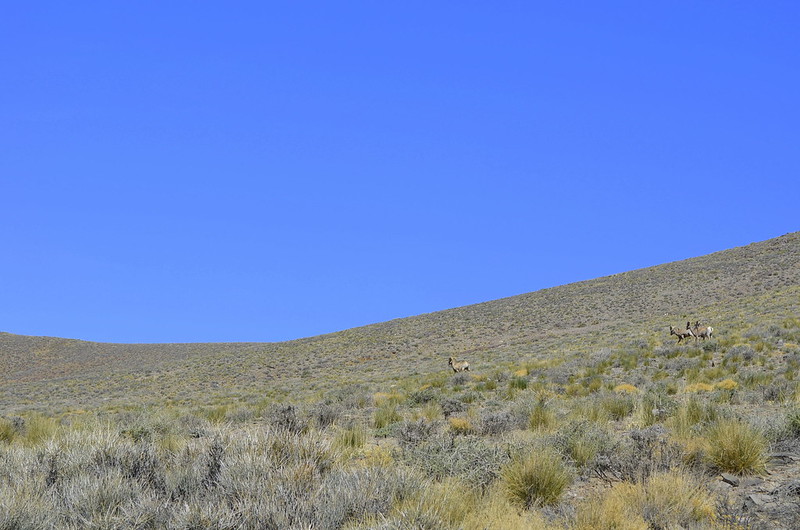
After the Kilns we headed towards the Stovepipe Wells Ranger station stopping at Aguereberry Point (Elevation 6433 ft) along the way.  We were excited to spot wild Desert Bighorn Sheep roaming along the trail.  Riley was certainly excited to encounter wild life, so we stopped and admired their behavior.

Death Valley Wildlife

It was a hot day and we’d finally made it to Stovepipe Wells ranger station where we picked up a few supplies and purchased our permits.  They also had National Park Passport stamps available, so we added Death Valley to our stamp collection.  We stopped for lunch a few miles down from the Ranger Station at the dunes, the elevation was Sea Level, and the mid-day heat was on.  We pulled to the pull-through spots in order to park the Jeep and trailer and ended up being quite the show for the tourists.  Because of the heat and lack of shade, I deployed the ARB awning from the side of the trailer and we setup tables and chair underneath to have lunch.  We had Japanese tourists actually stop and take pictures and we realized what glampers we were at the moment.  Here we were having an elaborate community lunch, with ice cold drinks out of our refrigerators amidst such harsh environment.  Creature comforts make all the difference in how you experience travel. Continue reading Death Valley National Park

Track Your Adventures for Free – Part III – Making the Connection

This article is Part III of a series called Track Your Adventures for Free where I outline how to use Ham Radio and your Smartphone as an affordable APRS tracking system.  For reference, here are links to the first 2 parts:

In part II I closed on the mention of modifying the BaoFeng headset and a smartphone headset such that the speaker output of the BaoFeng radio is connected to the microphone input of the Smartphone, and also have the Smartphone speaker output connect to the BaoFeng radio’s microphone input.  This is, for the most part, simple, but at Integrated Overland we like to build things that are technically sound and designed to remain functional.  Yes, you could simply cut the wires off the ends of the cables and connect the Speaker + and – to the microphone + and -, but this will result in problems down the road that have the potential to damage either your radio or smartphone, or both.  I am going to explain the technical details behind this, but I want to start off by ensuring you that doing it right is still a simple process and only requires adding 4 resistors.  Don’t be discouraged by the tech talk, this is still very simple, and you can feel free to skip ahead if you just want to implement the solution.  You can also skip the solution altogether and just pair the wires together, at the very end of the article I will discuss how to do this in a way that will minimize the risk, but given how simple the solution is, you may want to give it a shot.

So what’s the problem? The problem is that for both the radio and Smartphone, the speaker signals are designed to drive earphone speakers and produce audible noise.  This means that the speaker outputs are higher power outputs.  However, the microphone input for both and for most devices in general is designed to operate with low power signals that are generated by the microphone.  This means that you are trying to put higher power signals from the speaker into a port that is designed for lower power signals.  The speaker output levels for typical devices can range anywhere from 2V to 20V in amplitude (partially depending on the volume level).  A microphone input level is typically on the lowest end of this spectrum at around 0.2V to up to around 2V.  On an even more technical side note, the speaker and microphone ports have different impedance levels, but this is less important as we aren’t trying to achieve maximum signal transfer in either case.

So our basic problem is simple, we have a voltage level problem, we need to reduce the voltage, which is much easier than needing to amplify the voltage.  We have to shift a 2V-20V signal into a 0.2V-2V signal.  Incidentally, this is a 10 to 1 reduction, and because we all love technical details, we’ll mention this is a 20dB reduction.

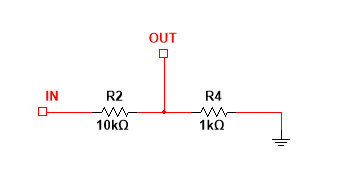
The basic solution to a basic problem then becomes a basic voltage divider circuit (and the cessation of usage of the word basic).  We need a 10:1 voltage divider, which can be achieved with 2 resistors.  The resistors have to have a 10 to 1 difference to meet the criteria, so you can use a 1kΩ resistor, and a 100Ω resistor, or different combinations of 10 to 1 ratio values.  However, I recommend that you use a 10kΩ resistor and a 1kΩ resistor.  Why? Because this would put roughly a 10kΩ impedance on the speaker side (high side), and a 1kΩ impedance on the microphone side.  This is more suitable for the application.  Now, to properly cover the basics, below are 2 images of what this voltage divider circuit looks like.

 Voltage Divider Example 1   Voltage Divider Example 2

These two circuits above are exactly the same.  I simply wanted to illustrate that the way these are shown in the schematic is not relevant to its operation in case we have readers who are unfamiliar with schematics.  What matters is the order, meaning that the input side has to enter into the higher value 10kΩ resistor, and then at the other side of the 10kΩ resistor, you tap your output, but this same point is connected to ground via the 1kΩ resistor.  How you lay it out in application does not matter as long as the connections are made at the correct point.

So we have solved the problem of reducing our signal levels, now how do we apply the solution to our particular problem? The answer is as follows:

Continue reading Track Your Adventures for Free – Part III – Making the Connection